

OSG Tool Integration in DE
Goal
This quickstart contains the complete instructions for integrating OpenScienceGrid tools in CyVerse Discovery Environment. OSG tools are intended for high-throughput processing of many files.
Prerequisites
Downloads, access, and services
In order to complete this tutorial you will need access to the following services/software
Prerequisite Preparation/Notes Link/Download CyVerse account You will need a CyVerse account to complete this exercise CyVerse User Portal Atmosphere Access (Optional – for building containers remotely) Atmosphere access is by request only Check or request access: CyVerse User Portal Installation of Docker Docker on the machine you’re building containers Atmosphere Installation instructions Installation of Singularity Singularity on the machine you’re building containers Atmosphere Installation instructions
Platform(s)
We will use the following CyVerse platform(s):
| Platform | Interface | Link | Platform Documentation | Quick Start |
|---|---|---|---|---|
| Discovery Environment | Web/Point-and-click | Discovery Environment | DE Manual | Discovery Environment Guide |
| Atmosphere | Cloud Virtual Machine | Atmosphere | Atmosphere Manual |
Input and example data
In order to complete this quickstart you will need to have the following inputs prepared
| Input File(s) | Format | Preparation/Notes | Example Data |
|---|---|---|---|
| Read1.fastq | fastq | Make sure it is a fastq file and not fasta file | Read1.fastq |
Get started
- Create a Docker image for your tool/software of interest
- Build the Docker image for your tool/software
- Test Docker image
- Submit a pull request to OSG github repo
- Integrate DE tool using “Add Tools” option in DE
1. Create a Docker image for your tool
This is the first step in the process of making OSG tool integration in DE. The minimum requirements for creating a Docker image include the following dependencies (apart from the dependencies that are needed for your tool of interest)
| Operating System | Directories | Dependencies | Files |
|---|---|---|---|
| Debian | /work |
icommands |
wrapper |
| Ubuntu 16+ | /cvmfs |
wget |
upload-files |
| Centos7+ | python3 |
create-ticket.sh |
For this example, we will use fastq-sample.
Let’s first create a Dockerfile using your favorite editor which satisfies the above requirements
$ mkdir fastq-sample-osg && cd fastq-sample-osg

$ wget https://data.cyverse.org/dav-anon/iplant/projects/osg/upload-files

$ wget https://data.cyverse.org/dav-anon/iplant/projects/osg/wrapper
$ vi Dockerfile

FROM ubuntu:xenial
MAINTAINER User Name <user@cyverse.org>

RUN mkdir /cvmfs /work

RUN apt-get update \
    && apt-get install -y lsb curl apt-transport-https python3 python-requests libfuse2 wget gcc make libpcre3-dev libz-dev

# Install fastq-tools
RUN wget http://homes.cs.washington.edu/~dcjones/fastq-tools/fastq-tools-0.8.tar.gz
RUN tar xvf fastq-tools-0.8.tar.gz
WORKDIR fastq-tools-0.8
RUN ./configure
RUN  make install fastq==0.8

WORKDIR /work

# Define the iRODS package
ENV ICMD_BASE="https://files.renci.org/pub/irods/releases/4.1.12/ubuntu14"
ENV ICMD_PKG="irods-icommands-4.1.12-ubuntu14-x86_64.deb"

# Install icommands.
RUN curl -o "$ICMD_PKG" "$ICMD_BASE/$ICMD_PKG" \
        && dpkg -i "$ICMD_PKG" \
        && rm -f "$ICMD_PKG"

# Install the wrapper script and the script to upload the output files.
ADD wrapper /usr/bin/wrapper
ADD upload-files /usr/bin/upload-files

# Make the wrapper script the default command.
CMD ["wrapper"]
Note
The Dockerfile and wrapper files are specific for this example fastq-sample tool.
If you want to create OSG tool for your tool of interest, replace the specific parts of the script
in wrapper script append lines # 117-122 with your job information:
   # Run the job.
def run_job(arguments, output_filename, error_filename):
    with open(output_filename, "w") as out, open(error_filename, "w") as err:
        rc = subprocess.call(["fastq-sample"] + arguments, stdout=out, stderr=err)
        if rc != 0:
            raise Exception("fastq-sample returned exit code {0}".format(rc))
Note
Be sure the upload-files and wrapper scripts are executable. This can be done by adding the following line to your Dockerfile:
# Make scripts executable:
RUN chmod +x /usr/bin/upload-files /usr/bin/wrapper
2. Build and push the Docker image to Dockerhub
Once you create the Dockerfile, next step is to build the Docker image and push it to Dockerhub manually (you can also do an automated build)
$ docker build -t upendradevisetty/fastq-sample-osg:0.8 .

$ docker push upendradevisetty/fastq-sample-osg:0.8
3. Test Docker image
Testing of OSG-fastq-sample docker image can be done in two ways: Locally using Singularity and on Open Science Grid (OSG). Since many users don’t have access to OSG, we recommed that you test it locally.
Important
This is very important step as it is very hard to troubleshoot after you integrate the OSG tool in DE
3.1 Create a folder with input file(s) and output folder on CyVerse Datastore
For this example, the only input file is Read1.fastq. I have this input file in this path on Datastore /iplant/home/upendra_35/fastq-sample-osg/Read1.fastq and output folder in this path on Datastore /iplant/home/upendra_35/fastq-sample-osg/output
3.2 Create input and output path files
The next step is to create an input and output path files that contains the paths to the input and output respectively.
$ cat input-paths.txt
  /iplant/home/upendra_35/fastq-sample-osg/Read1.fastq

$ cat output-paths.txt
  /iplant/home/upendra_35/fastq-sample-osg/output
3.3 Create input and output tickets from input and output paths files
Using create-tickets.sh <https://github.com/upendrak/fastq-sample-osg/blob/master/create-tickets.sh>, create tickets for both inputs and outputs
$ wget https://raw.githubusercontent.com/upendrak/fastq-sample-osg/master/create-tickets.sh

$ mkdir sample_data

$ bash create-tickets.sh -r input-paths.txt > sample_data/input_ticket.list
$ cat sample_data/input_ticket.list
  # application/vnd.de.path-list+csv; version=1
  c0837571b6b7416fb998c5b9b226ea,/iplant/home/upendra_35/fastq-sample-osg/Read1.fastq

$ bash create-tickets.sh -w output-paths.txt > sample_data/output_ticket.list
$ cat sample_data/output_ticket.list
  # application/vnd.de.path-list+csv; version=1
  3fe4ea0dab5241cfb69420335c0902,/iplant/home/upendra_35/fastq-sample-osg/output
3.4 Create a config.json file in the sample_data folder
Here is an example of config.json for the fastq-sample-osg tool
$ vi sample_data/config.json
 {
     "arguments": [
         "-n",
         "10",
   "Read1.fastq"
     ],
     "irods_host": "davos.cyverse.org",
     "irods_port": 1247,
     "irods_job_user": "upendra_35",
     "irods_user_name": "job",
     "irods_zone_name": "",
     "input_ticket_list": "input_ticket.list",
     "output_ticket_list": "output_ticket.list",
     "status_update_url": "https://de.cyverse.org/job/bd1a1b53-9a7e-4031-bf0c-227a0c63f555/status",
     "stdout": "out.txt",
     "stderr": "err.txt"
 }
This is similar to running on the commandline like this..
$ fastq-sample -n 10 Read1.fastq
3.5 Pull the Docker image as singularity file (.sif)
Important
You must have Singularity installed to complete this step.
$ singularity pull docker://upendradevisetty/fastq-sample-osg:0.8
This will create fastq-sample-osg_0.8.sif singularity image in your working directory
3.6 Test the singularity image
Important
Remove your current iRODS password: rm ~/.irods/.irodsA
Running this container will overwrite the ~/.irods/irods_environment.json file on the localhost. To regenerate the previous iRODS environment, rm -rf ~/.irods/irods_environment.json and run iinit again.
Once you have created the input_ticket.list, output_ticket.list and config.json files in the /sample_data directory, you are ready for a test with the Singularity image:
$ cd sample_data

$ singularity exec ../fastq-sample-osg_0.8.sif ../wrapper
  running: configuration successfully loaded
  running: initializing the iRODS connection
  running: downloading the input files
  Enter your current iRODS password:
  running: processing the input files
  running: uploading the output files
  Enter your current iRODS password:
  Enter your current iRODS password:Enter your current iRODS password:

  Enter your current iRODS password:
  Enter your current iRODS password:
  Enter your current iRODS password:Enter your current iRODS password:
  Enter your current iRODS password:Enter your current iRODS password:completed: job completed successfully
Note
It will prompt you to enter your irods passwords several times, if so, then keep pressing the ENTER until the job is successfully finished. The output files will be uploaded to your output folder in datastore.
Once your job has finished, you should expect to see the input (Read1.fastq) and output (sample.fastq) files in the current working directory and also in the in the output directory.
4. Submit a pull request to OSG github repo for fastq-sample-osg tool
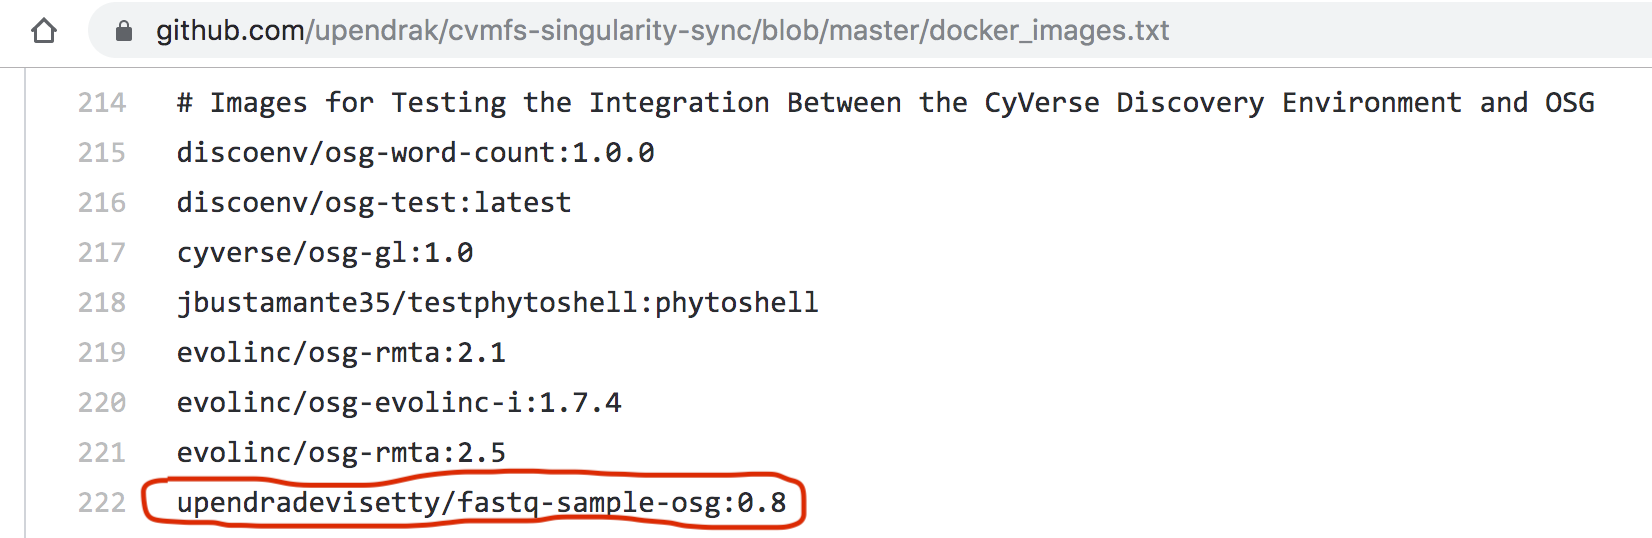
Once the Singularity run works, add your Docker image in here. For this particular example, we will add upendradevisetty/fastq-sample-osg:0.8 in there.
Note
You will have to fork and do a PR for this to work
Here is a screenshot of fastq-sample-osg:0.8 pull request to OSG github repo
After the PR is merged, it takes few hours for the image to be available on CVMFS.
5. Integrate DE tool using “Add Tools” option in DE
After the image is available on OSG, it is now ready to be integrated into DE.
5.1 Log-in to CyVerse Discovery Environment and click on the “Apps” window
5.2 Click “Manage Tools” -> “Tools” -> “Add Tool” and fill the details about your Docker image
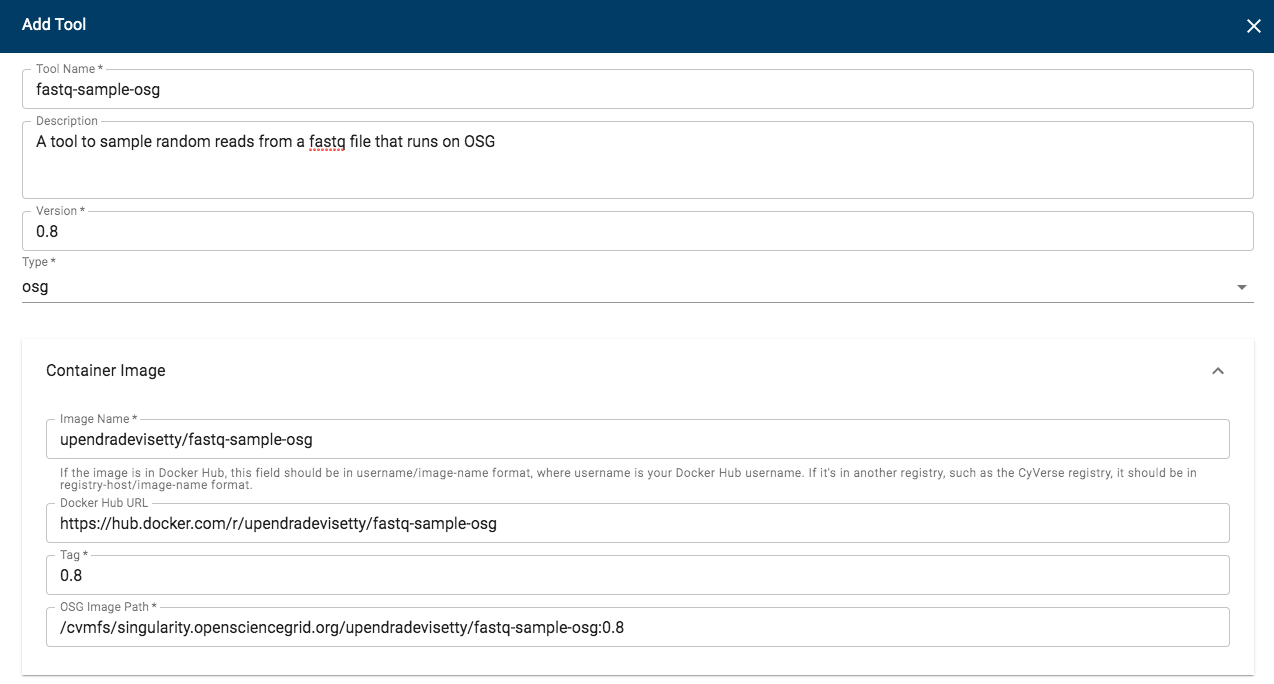
Procede here to create an app interface in the CyVerse Discovery Environment
Additional information, help
Post your question using the intercom button on the bottom right of this page:
Fix or improve this documentation
- Search for an answer: CyVerse Learning Center
- Ask us for help:
click
 on the lower right-hand side of the page
 - Report an issue or submit a change: Github Repo Link
- Send feedback: Tutorials@CyVerse.org